How to Build a Zero-Cost RHEL 10 Practice Lab Using VirtualBox
Apr 06, 2026
Look, last month while prepping for my RHCE renewal—my first renewal in a while, actually—after 14 years bouncing between DevOps gigs at startups in the Netherlands and big enterprises, I hit an absolute wall. I was knee-deep designing a full EKS-like Kubernetes cluster on AWS using kubeadm, Terraform, and Ansible. The setup included Ubuntu 22.04 hosts with Ansible 2.15 for config. The whole nine yards.
But then the client threw a curveball and demanded RHEL 10 compatibility. Red Hat’s no-cost developer subscription is great, but it wouldn’t cover production-like testing without burning cash on cloud instances. I needed a local lab, stat, and zero-cost since this was just a side project.
Honestly, I wasn’t entirely sure if VirtualBox could handle it smoothly. I’ve used VMware plenty as an SRE, but VirtualBox always felt a bit clunky from my old sysadmin days at a small agency. Looking back, I probably should have started with KVM on my Fedora host, but hey, VirtualBox was already installed on my machine, so I just went with it.
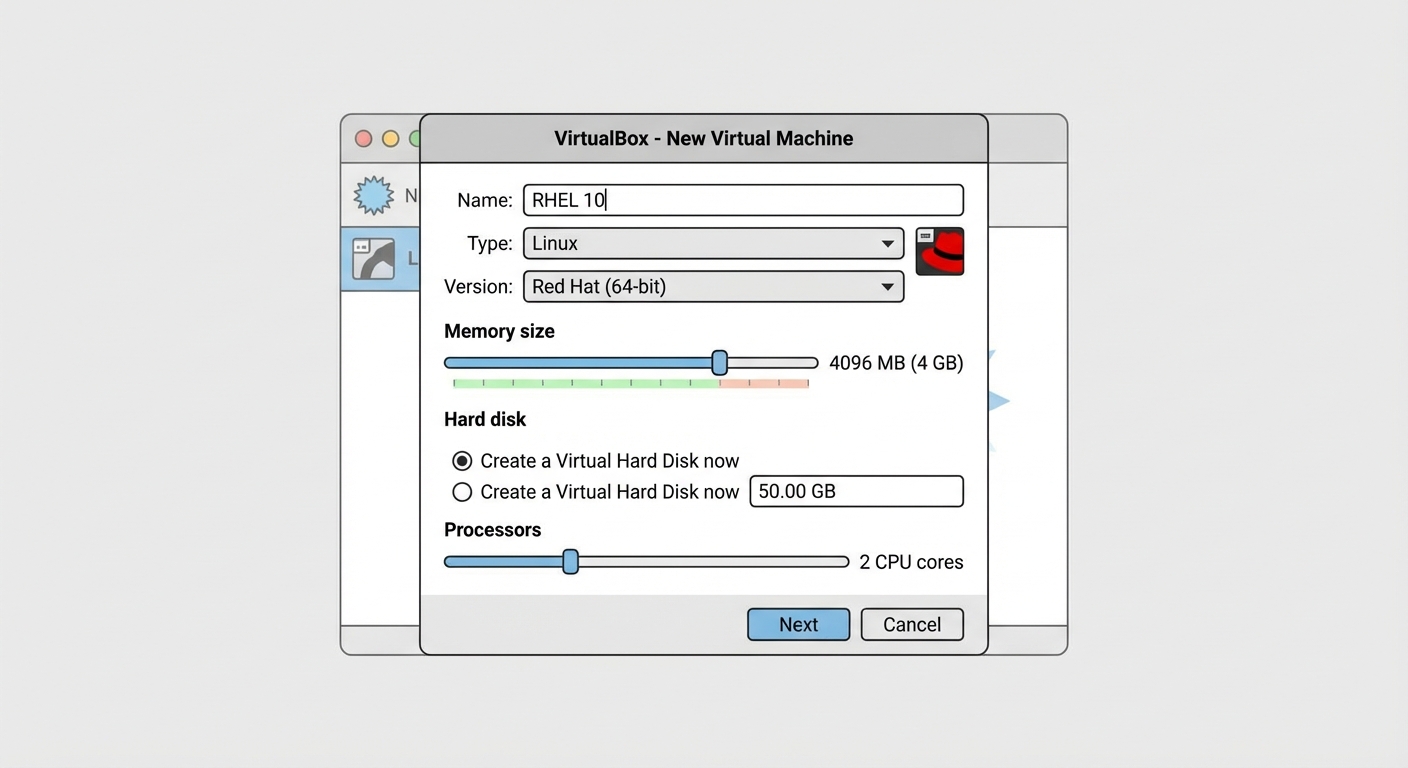
First off, you need to grab the RHEL 10 ISO from Red Hat’s developer site. It’s actually completely free with a quick signup, and thankfully there is absolutely no credit card nonsense to deal with. Once you have that downloaded, fire up Oracle VirtualBox Manager and click New. Name it something obvious like RHEL10-VM1, and pick Red Hat (64-bit) from the dropdown. Make sure to skip the unattended install option. I know some people swear by unattended installs to save time, but I really like having manual control over the whole process, especially when setting up a baseline image for a lab environment. You just never know what weird defaults it might pick for the disk partitions, and fixing that after the fact is always a massive pain.
Next, in the Specify virtual hardware screen, bump the memory to 2048 MB and the CPU to 2. My current laptop’s got 32GB of RAM, so it handles a few VMs without breaking a sweat, but definitely scale down if you’re stuck on 16GB. For the disk, just create a 20GB VDI, dynamically allocated, and then hit Finish.
Now hop into the VM settings. The System tab will just confirm those specs you just punched in. Under Network, here’s where it gets crucial: set Adapter 1 to Bridged Adapter and pick your WiFi card (mine is an Intel Wireless-AC 9560, for example). Use the Intel PRO/1000 MT Desktop adapter type, and make sure your boot order is set to Hard Disk first.
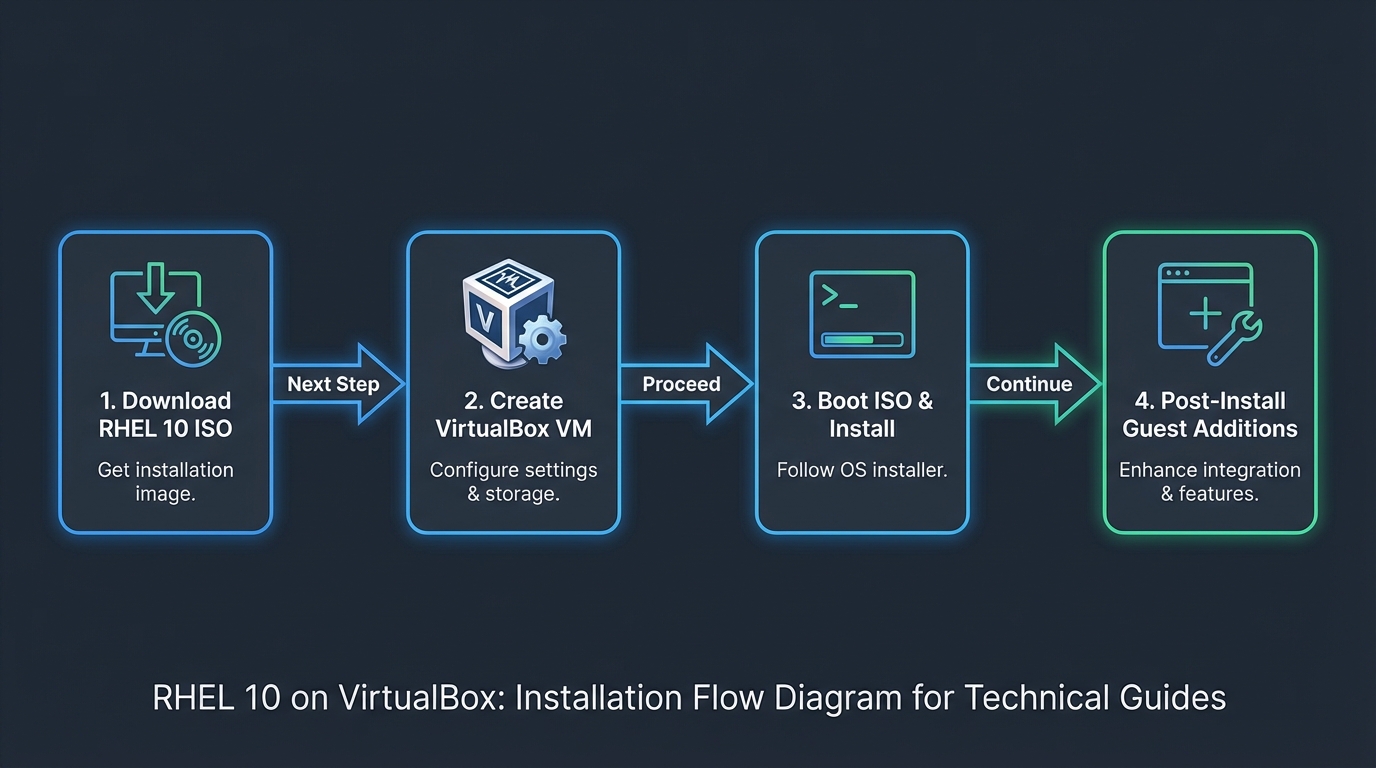
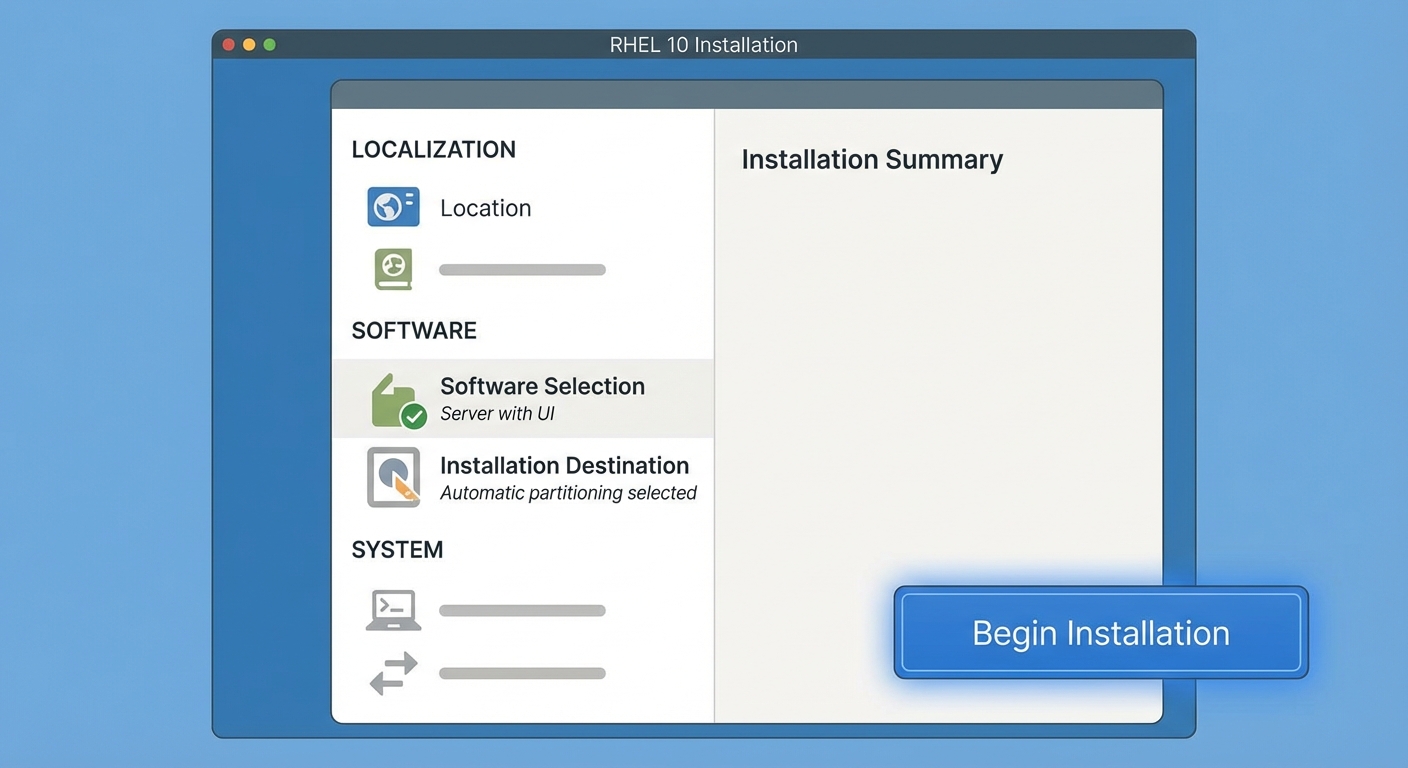
Go ahead and attach the ISO to Storage and start the VM. Run through the RHEL 10 install, set a secure root password, and—I always forget this part—make sure to actually enable networking during the setup wizard.
Once it boots up, register the system with subscription-manager register --auto-attach, and you’re golden. To build the actual lab, clone it for a second VM (RHEL10-VM2): Right-click, select Clone, choose full clone, and then definitely remember to tweak the MAC address on the copy so you avoid nasty DHCP fights on your local network. Now you should be able to ping between them over the bridged net. It’s like having your own little datacenter right there on your desk—perfect for multi-node practice.
💡 Take the next step
If this resonated, RHCSA Bootcamp (RHEL 10) - Arabic is where I teach this systematically — no fluff, just the skills that matter in the real world.
